In December everyone is doing 'advent of code', but I thought I will make 'advent of things'. Make something every week, and I thought I will learn a lot by making everyday things that I am taking for granted, my plan was to make a calculator, a wrist watch and a remote controlled car (433mhz). To think deeply about things that have the same design for decades: why are they the way they are?
I only managed to make a calculator.
While making it I thought I would teach my kid some basic electronics, but in the end, I hope I showed her how to be patient. Nothing worked the way I thought it would, I broke like 10 things, burned my hands like 20 times and every proptotype was worse than the previous one.
I also thought I would have a good experience and learnings to share, but I only accumulated scars, so I will just present the versions I made and hope that the next time I will manage to build on top of the scars.
I really wanted to make something so cool that my daughter would use it at school, and since she knows python, I wanted the calculator to be just a python repl. So I needed full functioning keyboard, and I thought I will make one with 8 buttons and chords. I bought a bunch of esp32s from aliexpress (s2, c3, wroom32 etc), and I bought all kinds of voltage regulators, since I wasnt sure if I would manage to power it with cr2032 batteries or I would fit cr123 in the case, or I would use a normal 9v battery. I am complete novice in electronics, so I thought I would just try things out. This is how the first version looked:
V0.0.0 (8 BUTTONS):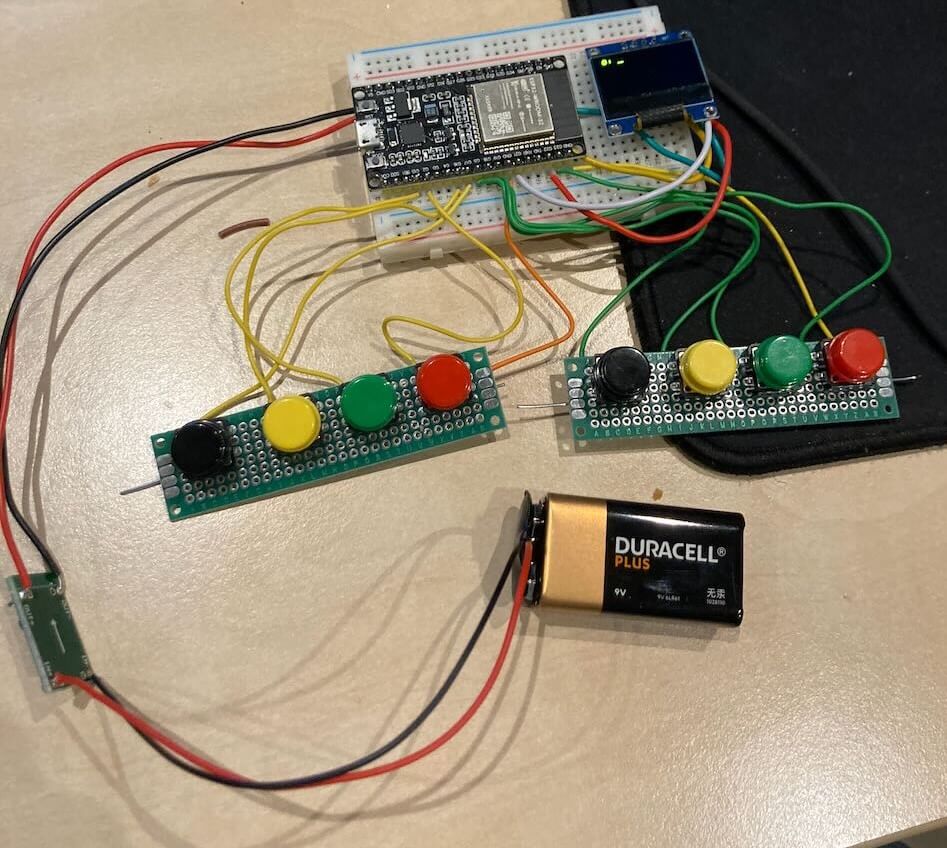
It had 8 buttons, most left one is shift, most right is control, the rest are 6 bits used to make 64 characters.
The
editor is controlled with basic bindings ctrl+n, ctrl+p, ctrl+j etc. Each line was executed with ctrl+r, and its
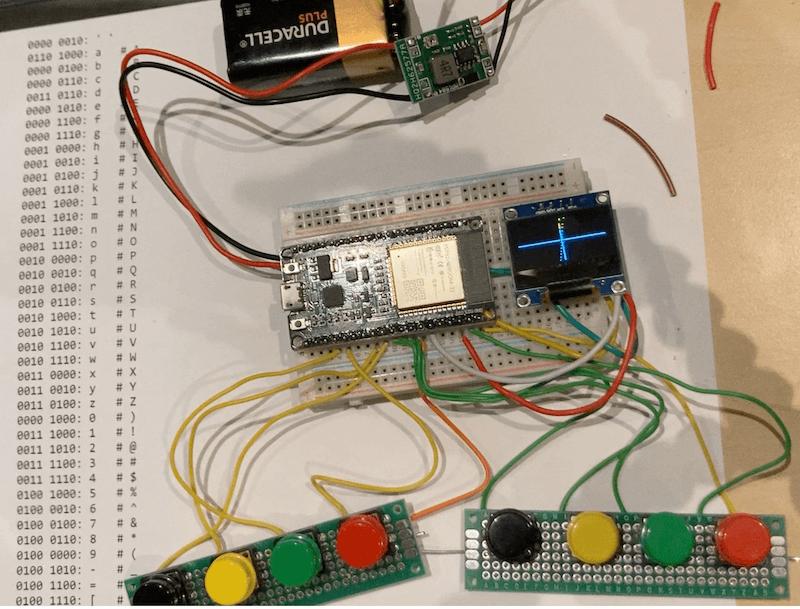
output was printed below. and you could graph things, e.g. if you have x=5; x*9; and then g(1) (which means
graph line 1), it will evaluate x*9 from x = -100 to x = 100 and draw its y value
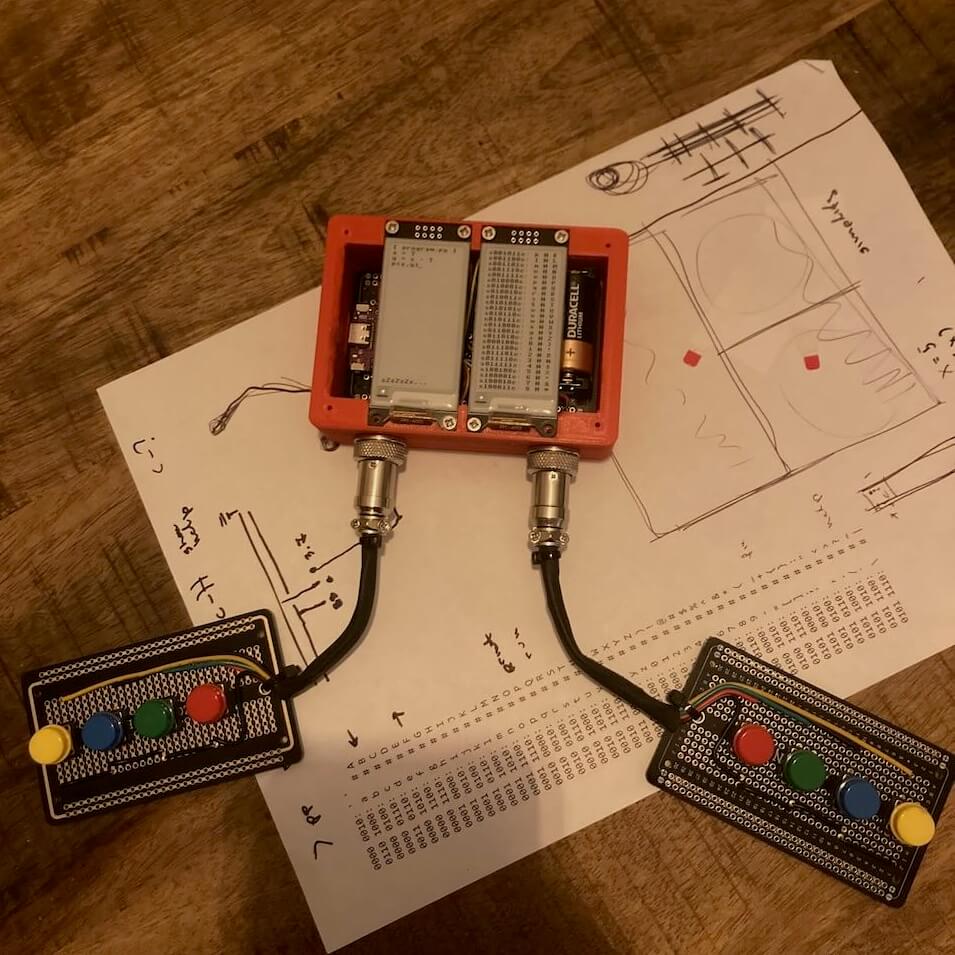
Later I decided to use aviator connectors for the cables (for the cool factor) and two epaper displays. On the left display you have the code, and press ctrl + r (which is 00100101) which then is rendered on the second display:
ctrl +
r: run
l: refresh
p: prev line
n: next line
m: new line
a: home
e: end
b: left
f: right
0-9: help

keycodes:
s shift, c ctrl
s000001c: ' '
s110100c: a # A
s000010c: b # B
s000011c: c # C
s011011c: d # D
s000101c: e # E
s000110c: f # F
s000111c: g # G
s001000c: h # H
s001001c: i # I
s001010c: j # J
s001011c: k # K
s001100c: l # L
s001101c: m # M
s001110c: n # N
s001111c: o # O
s010000c: p # P
s010001c: q # Q
s010010c: r # R
s010011c: s # S
s010100c: t # T
s010101c: u # U
s010110c: v # V
s010111c: w # W
s011000c: x # X
s011001c: y # Y
s011010c: z # Z
s000100c: 0 # )
s011100c: 1 # !
s011101c: 2 # @
s011110c: 3 # #
s011111c: 4 # $
s100100c: 5 # %
s100001c: 6 # ^
s100010c: 7 # &
s100011c: 8 # *
s100000c: 9 # (
s100101c: - # _
s100110c: = # +
s100111c: [ # {
s101000c: ] # }
s101001c: ; # :
s101010c: \' # "
s101011c: , # <
s101100c: . # >
s101101c: / # ?
s101110c: ` # ~
s101111c: \ # |
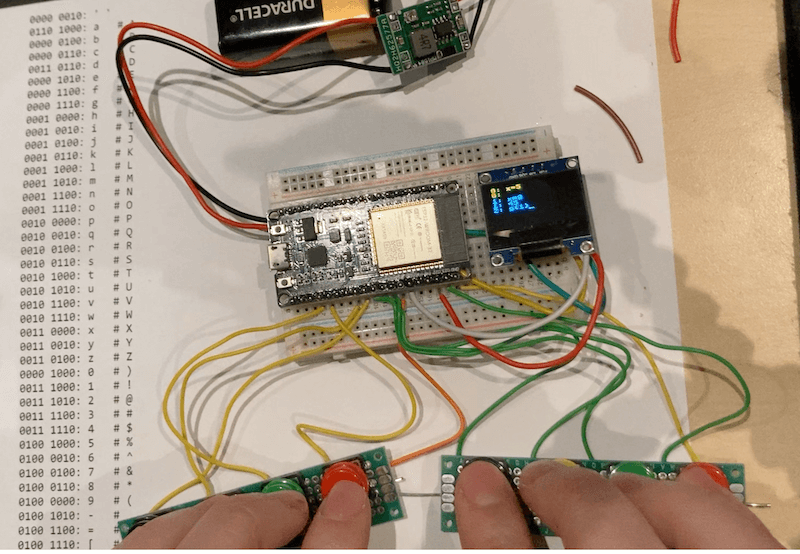
Every day I would 3d print a new case and keep experimenting, I would tweak the design in the day, start the print and in 1am I would try it out, it would suck, and in the morning I would start again.
The aviator connectors and the eink display were contributing a lot to the cool factor, but I was upset that my daughter would have to learn a madeup sequences, so then I decided I would use just ASCII as she also knows most of the alphabet's codes, but as I was talking to her she said "why don't you just use morse code", and it got me thinking, what is the minimum amount of buttons you can have on a calculator?
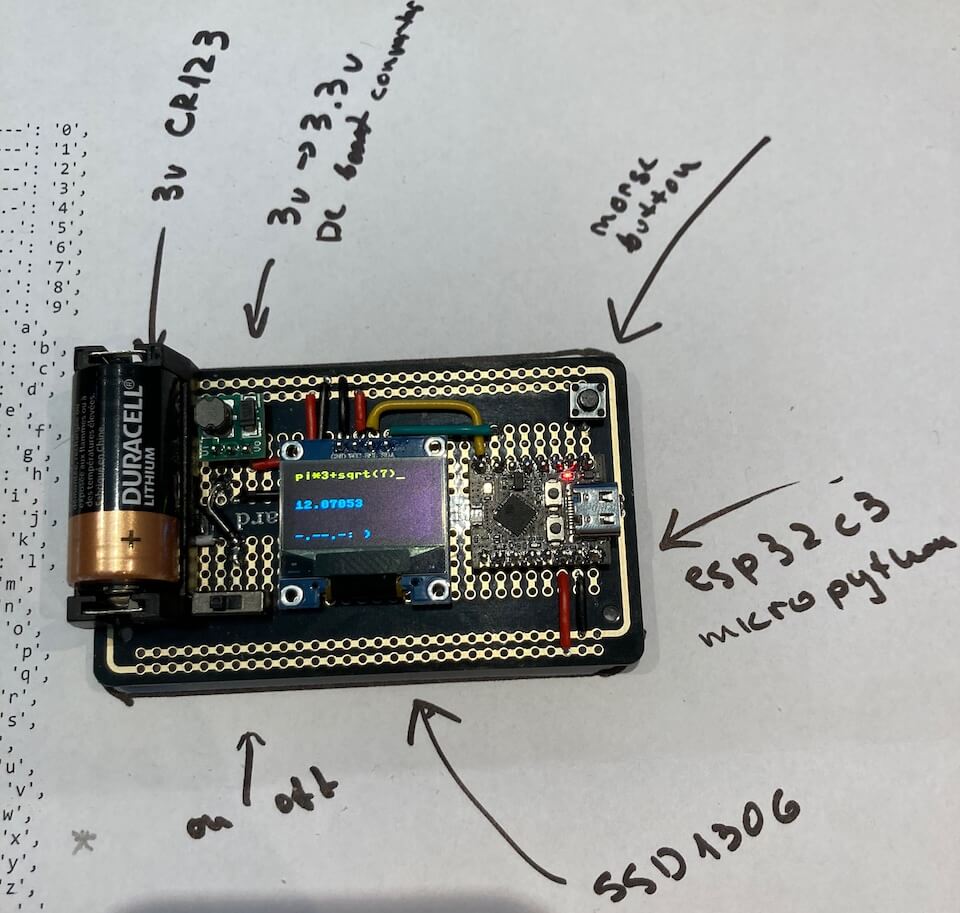
V0.0.2 (ONE BUTTON):So, yesterday I managed to make it just in time for the new year, and luckily my 3d printer got broken, so I didnt have a choice but to just use a naked board:
A single calculator costs about 12€, but if you buy all the parts from aliexpress I think you can make it for about 5€.
Schematic: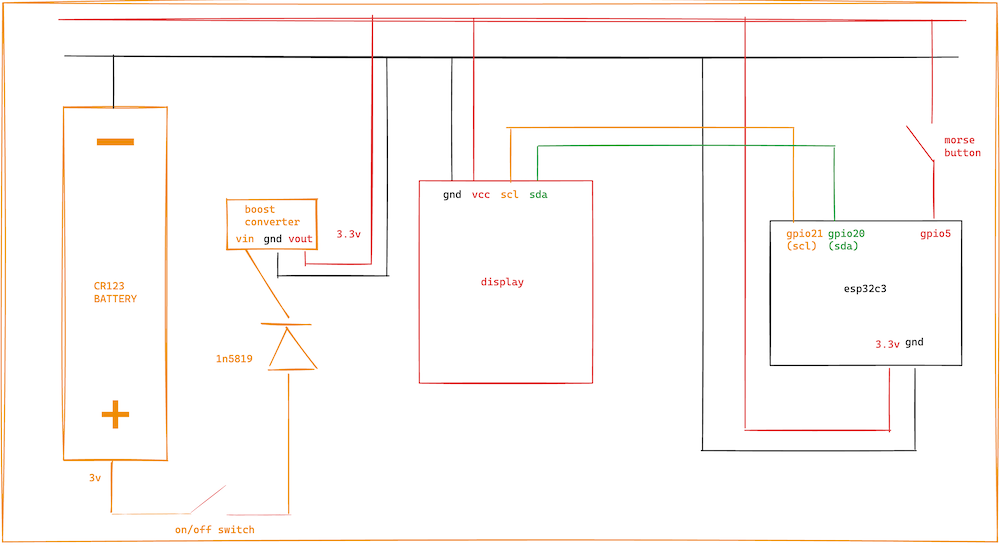 Software:
By default ESP32's boot is somewhat slow, it has verbose logging enabled and validates the image at boot, so I had to compile micropython myself in order to disable those. This was somewhat annoying as esp-idf is at version 5.5 or something and micropython supports 5.1, but in the end I managed, nothing super suprising, just a bunch of random quirks that I wont even bother to remember and will just scratch my head again the next time I have to do it. I wont even bother to write about it.
How is it possible that every build system is so cursed.
Code: main.py
ssd1306.py
morse.py
You can copy them to your esp32 (after flashing with micropython) by doing:
micropython/tools/pyboard.py -b 115200 -d /dev/tty.usbmodem101 -f cp main.py :main.py
micropython/tools/pyboard.py -b 115200 -d /dev/tty.usbmodem101 -f cp ssd1306.py :ssd1306.py
micropython/tools/pyboard.py -b 115200 -d /dev/tty.usbmodem101 -f cp morse.py :morse.py
Each of the version had its own UX issues, the first version had only 5 rows, I thought it made sense to evaluate each row instead of the whole buffer, but then you couldnt make 'programs', the second version had a lot of UX issues due to the eink partial refreshing and deep sleep, but in the end it was working pretty ok, it just was kind of clunky, and of course the final version has most of the issues, but it is the coolest one.
| ----- | 0 |
| .---- | 1 |
| ..--- | 2 |
| ...-- | 3 |
| ....- | 4 |
| ..... | 5 |
| -.... | 6 |
| --... | 7 |
| ---.. | 8 |
| ----. | 9 |
| .- | a |
| -... | b |
| -.-. | c |
| -.. | d |
| . | e |
| ..-. | f |
| --. | g |
| .... | h |
| .. | i |
| .--- | j |
| -.- | k |
| .-.. | l |
| -- | m |
| -. | n |
| --- | o |
| .--. | p |
| --.- | q |
| .-. | r |
| ... | s |
| - | t |
| ..- | u |
| ...- | v |
| .-- | w |
| -..- | x (multiply) |
| -.-- | y |
| --.. | z |
| .-.-.- | . |
| --..-- | , |
| ..--.. | ? |
| -.-.-- | ! |
| -....- | - |
| -..-. | / |
| .--.-. | @ |
| -.--. | ( |
| -.--.- | ) |
| -...- | = |
| .-.-. | + |
| .----. | ' |
| -.-.-. | ; |
| ..--.- | _ |
| .-..-. | " |
| ---... | : |
| .-... | & |
| ........ | ERROR |
Its funny that this calculator is more powerul than the first computer I had, which was 133mhz AMD K5, and this esp32 runs at 160mhz :)
My new year resolution is to learn KiCad and FreeCAD and next year, and make many more things!
 Programming Time, which is a game to
teach
python and some more fundamental algorithms, from hash tables to RSA
Programming Time, which is a game to
teach
python and some more fundamental algorithms, from hash tables to RSA
 The C Pointer Game - Pointers, Arrays and
Strings,
a game to teach kids to look at the computer memory and understand references and values
The C Pointer Game - Pointers, Arrays and
Strings,
a game to teach kids to look at the computer memory and understand references and values
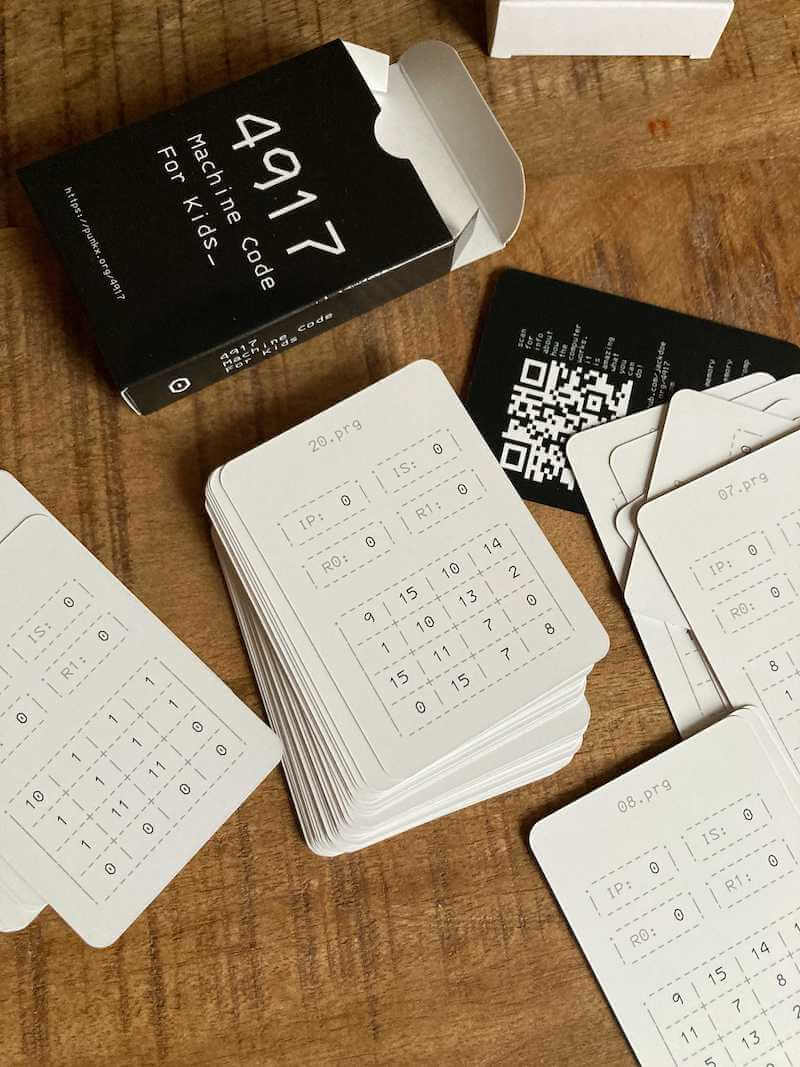 4917, a game to teach kids machine code and how the
CPU
works with memory and registers
4917, a game to teach kids machine code and how the
CPU
works with memory and registers
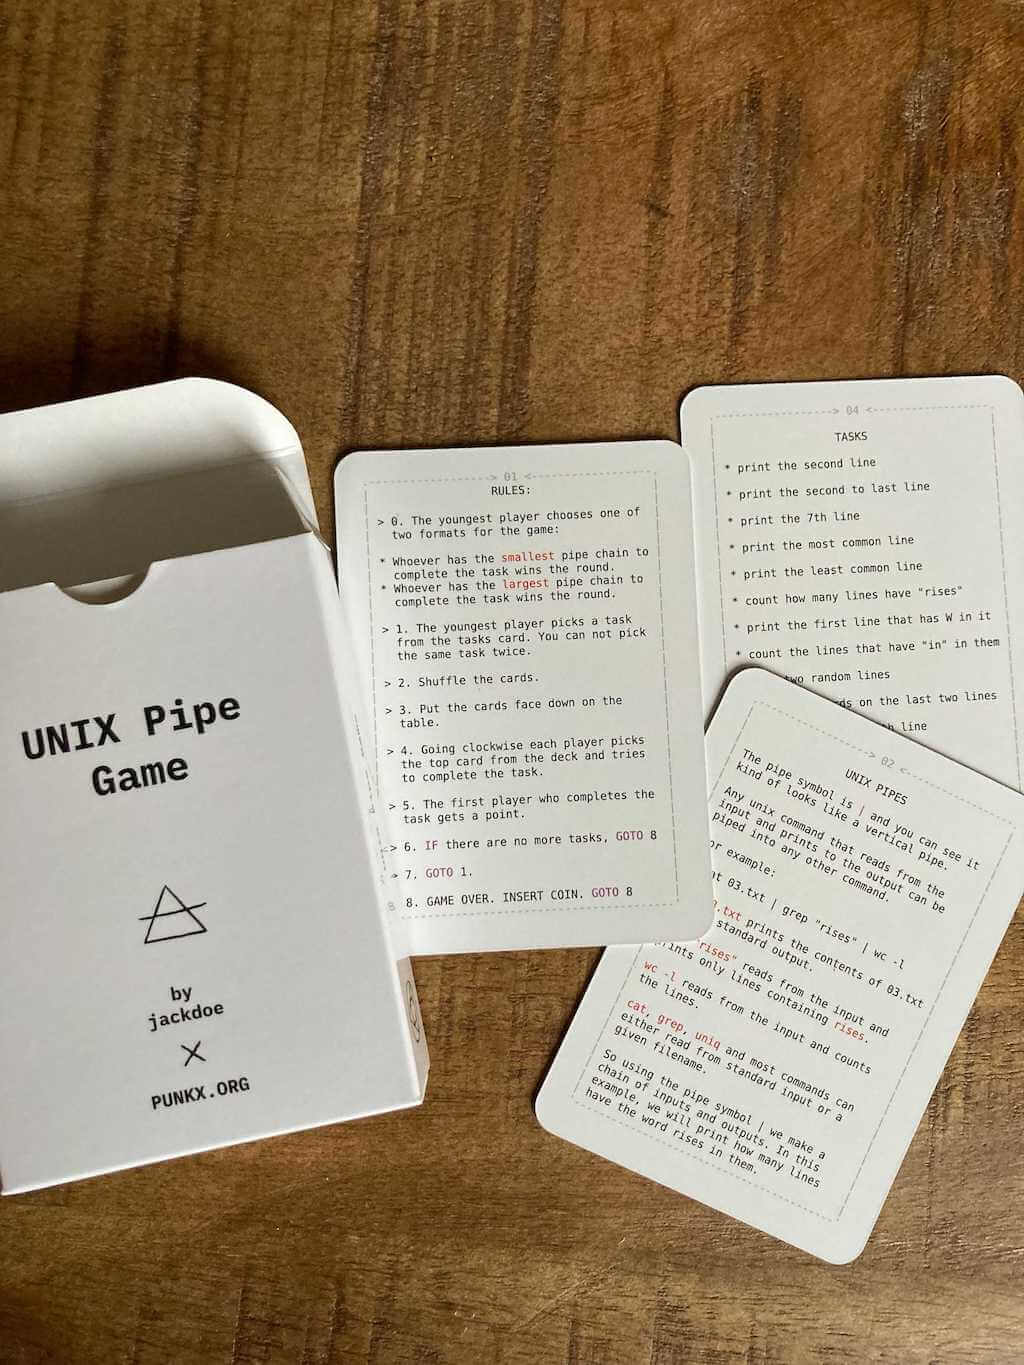 The Unix Pipes Game, a game to teach kids to
use
basic UNIX commands:
The Unix Pipes Game, a game to teach kids to
use
basic UNIX commands: cat, sort, grep, head, tail, wc, uniq
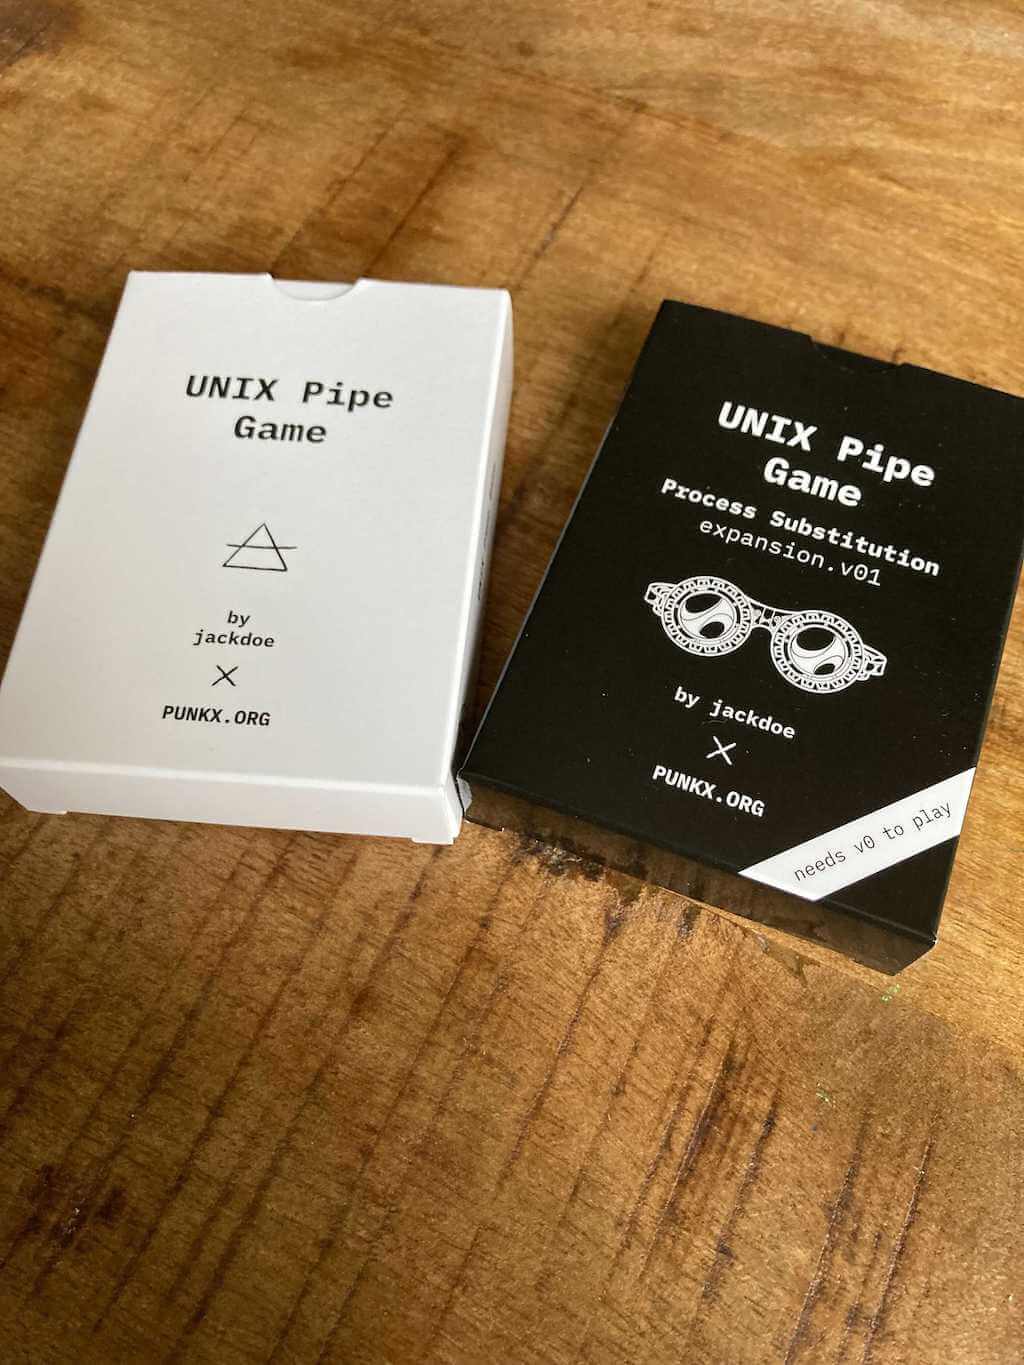 The Unix Pipes Game - Process
Substitution,
an expansion of the Unix Pipes Game to teach process substitution and also:
The Unix Pipes Game - Process
Substitution,
an expansion of the Unix Pipes Game to teach process substitution and also: paste, tr, cut, bc
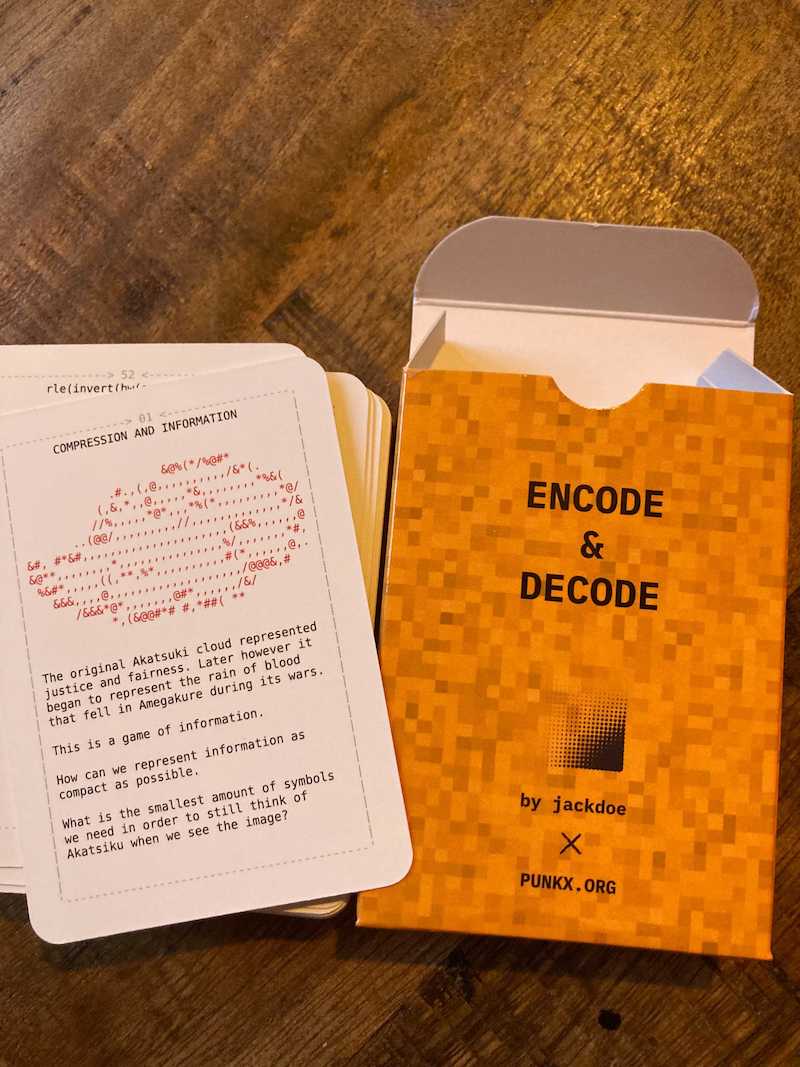 RunLength Encoding for Kids, small cards
"game" to explain runlength encoding
RunLength Encoding for Kids, small cards
"game" to explain runlength encoding
 PUNK0 - The Function Composition Card Game, use cards
to manipulate a list and use its values to win the game
PUNK0 - The Function Composition Card Game, use cards
to manipulate a list and use its values to win the game
![]() PROJEKT: OVERFLOW, RISCV assembler boardgame
PROJEKT: OVERFLOW, RISCV assembler boardgame
 Programming
for
kids, a log of my journey of teaching my daughter how to code
Programming
for
kids, a log of my journey of teaching my daughter how to code